Instead of manually copying every skipping session, connect your smart weighted jump rope to Strava through its companion app only if that app explicitly supports Strava export. Otherwise, use a manual Strava workout entry; an electronic counter alone does not establish a connection.
- To connect smart weighted jump rope to Strava, first confirm the companion app explicitly supports Strava export.
- Sweatjoy’s electronic-counter rope is fitness gear; its supplied description does not confirm Bluetooth or Strava integration.
- Use a manual Strava workout when no supported export exists, keeping jump counts in the description.
- Save one Strava activity per session, and check a test workout before enabling automatic uploads.
Why this matters
A counter, a phone connection, and a Strava connection are different features. A rope can count jumps without sending anything to your phone. A companion app can store workouts without exporting them to Strava.
In 2026, your starting point is the rope’s documentation—not the word smart on its packaging. Look for a named companion app, supported phone connection, and an explicit Strava integration. Each answers a different question.
Sweatjoy lists the Smart Weighted Jump Rope with Electronic Counter. The supplied product information identifies an electronic counter but does not establish Bluetooth, a companion app, or Strava export. Sweatjoy is best for fitness enthusiasts shopping for training gear, not for establishing a verified Strava integration.
Keep that distinction clear before buying equipment for automatic workout tracking. Choose your connection route from documented features, then test what actually reaches your activity history.
Before you start
- Accounts and access: Have access to your Strava account. For automatic export, also have the rope manufacturer’s documented companion app and the account used to save your rope workouts.
- Materials: Keep the rope instructions nearby and prepare a short test session. For manual logging, have your workout date, start time, duration, and any jump count you want to record.
- The gotcha: Bluetooth pairing does not prove Strava compatibility. Stop the automatic setup if the companion app does not explicitly offer Strava export; do not assume Apple Health or another fitness service will bridge the gap.
Use the manufacturer’s instructions to check phone compatibility and required permissions before starting. Do not install an unrelated rope app just because its name sounds suitable. A similar-looking device is not evidence that the same app works.
For this 2026 workflow, separate device setup from account authorization. The rope connects to its supported app; the app authorizes access to Strava. Those are separate tasks, and either can be the point where automatic logging stops.
Choose your recording route
Use supported companion-app export for automation. Use manual entry when support is absent. Neither route guarantees that Strava will display the rope’s jump count as a dedicated metric.
| Recording route | Best for | What it does | Advantage | Limitation |
|---|---|---|---|---|
| Supported companion-app export | People whose rope app explicitly supports Strava | Sends supported workout data through an authorized account connection | Removes repeated manual entry after setup | Depends on the app’s integration and exported fields |
| Manual Strava entry | People with a counter-only rope or no supported export | Adds a workout using details you enter | Does not require a rope-to-phone connection | Requires entry after each session; jump counts belong in notes |
Do not select automatic export simply because it sounds more convenient. Select it because the documented integration exists. A manual record with the correct duration is more useful than repeated attempts to connect unsupported equipment.
There is also a practical trade-off: the companion app can remain your detailed rope log while Strava holds your general training history. You do not need identical displays in both places to maintain a useful record.
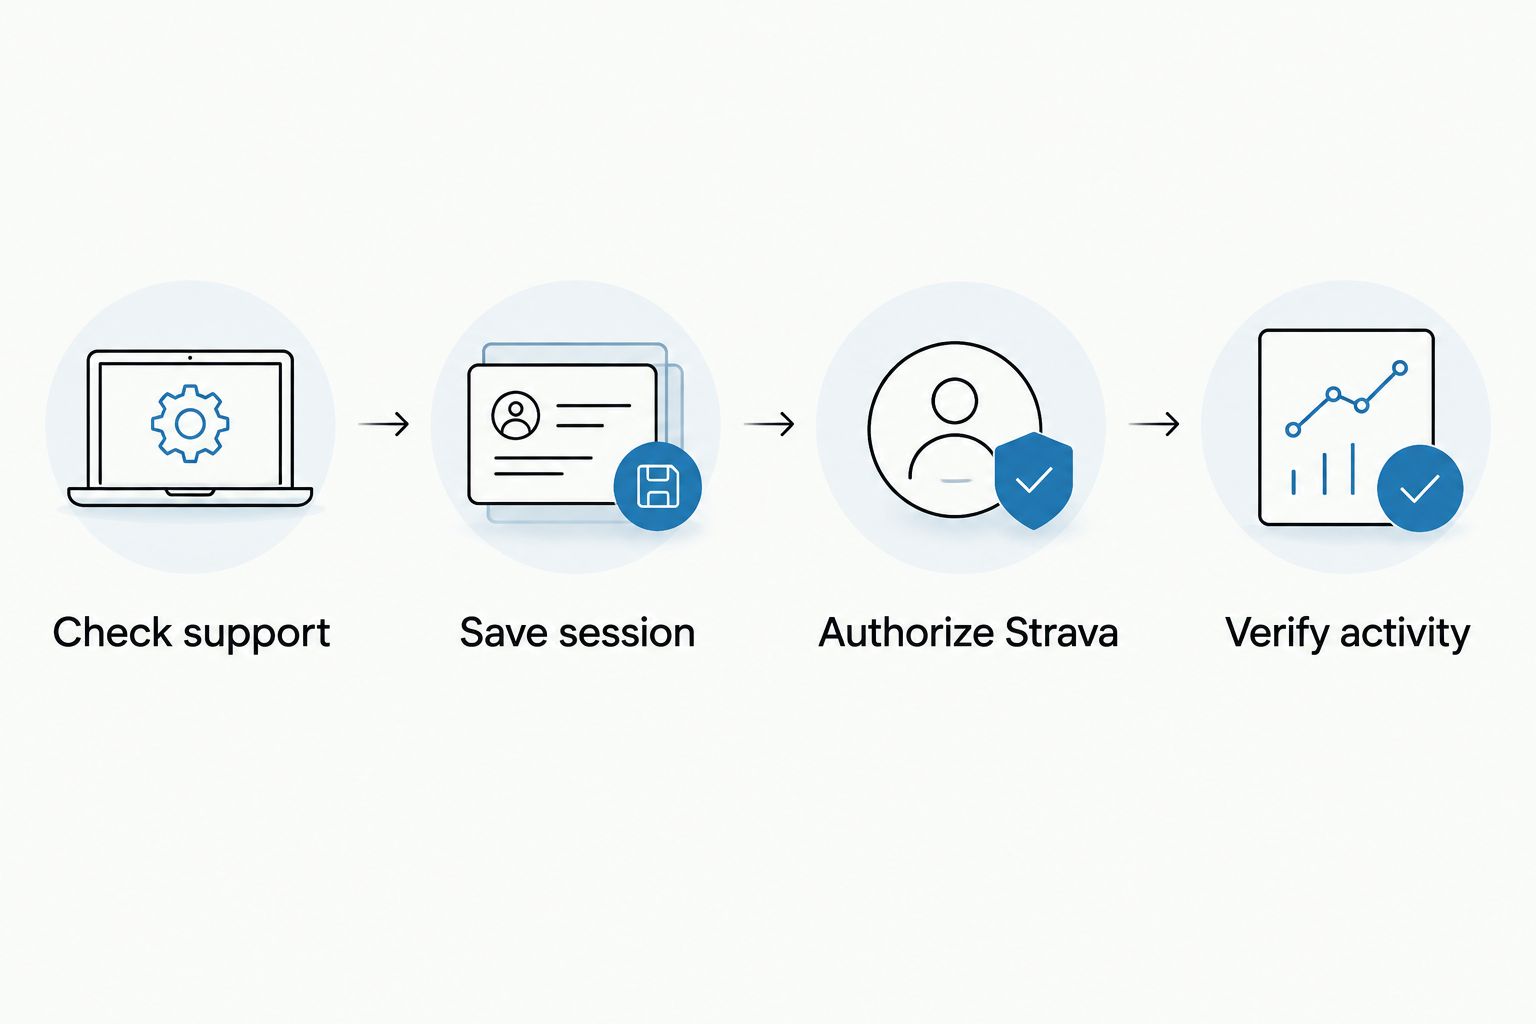
Device and companion-app setup
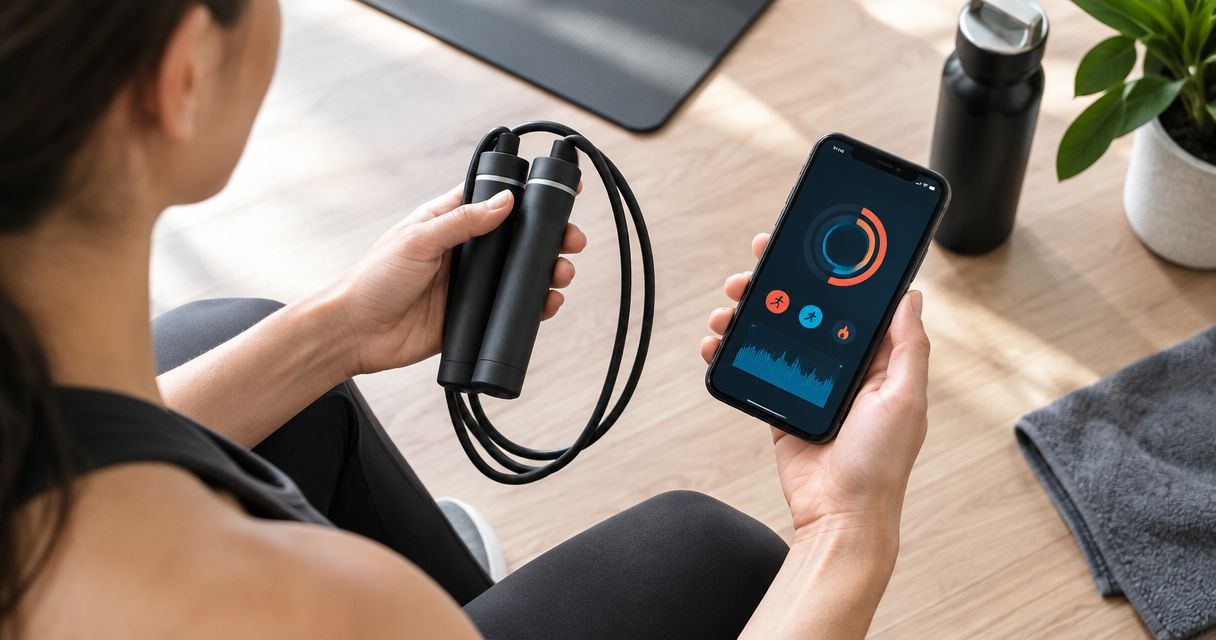
- Check the instructions. Identify the exact companion app named for your rope. If the instructions describe only an onboard counter, use the manual workflow below instead.
- Install the documented app. Sign in to the account where you intend to keep your workouts. Avoid creating a second account during troubleshooting.
- Connect the rope as instructed. Follow the manufacturer’s pairing procedure and grant only the permissions required for that connection. Do not substitute phone Bluetooth settings for an in-app pairing process when the instructions require the app.
- Record a short test. Use a 60-second logging test, rather than a full training session, to check the recording process. This is a setup check, not a workout prescription.
- Finish and save the session. Open the saved workout in the companion app. Check that its date and duration match what you recorded.
Expected result: You can open a saved rope workout in the documented companion app. If that result is missing, fix device recording before attempting Strava authorization.
A changing number on the handle proves that the counter is operating. It does not prove the app has received or saved a session. Check the saved record itself before moving on.
Keep the test easy to identify. Give it a clear test title if the companion app supports naming workouts, or note its start time so you can recognise it later.
Strava account authorization
- Locate the documented Strava integration. Consult the companion app’s help or connection settings. App-specific labels differ; use its actual instructions rather than searching for an assumed button name.
- Start the Strava authorization process. Continue only when the app explicitly identifies Strava as the destination.
- Check the Strava account. Confirm that the authorization screen belongs to the account where you want your workouts to appear. A browser already signed into another account can send you down the wrong path.
- Review the requested access. Read the permissions before approving them. If you do not want to grant that access, use manual entry instead.
- Complete the documented setup. Return to the companion app and check whether the connection is shown as active. Follow its instructions for automatic export or sending an individual saved workout.
Expected result: The companion app shows an authorized Strava connection, and you know whether export happens automatically or requires an action after saving.
Authorization is not the same as a successful upload. Finish the next verification stage before relying on the connection for your regular training log.
If no Strava integration is documented, stop here. Reinstalling apps, resetting Bluetooth, or repeatedly signing in will not establish support that has not been confirmed.
Export verification
- Send the test through the supported route. Use the companion app’s documented export action, or complete a new test if its automatic connection applies only to subsequent workouts.
- Open your Strava activity history. Find the test by its date and start time. Check the activity itself, not just the app’s connection indicator.
- Compare the basic record. Check the workout date, duration, and activity type against the source session. Resolve differences before treating the export as reliable.
- Inspect the details. Look for the information you actually need. Do not assume jump count, rope weight, or interval breakdowns become dedicated Strava fields.
- Choose one recording route. Keep 1 Strava entry per session. If export works, do not also create a manual entry for the same workout.
Expected result: You have one identifiable Strava activity that matches your saved test, with a clear understanding of which details transferred.
Use this sequence as your 2026 connection check. A successful account login is only an intermediate step; the saved activity is the evidence that your workflow works.
Manual Strava workout setup
Use manual entry when your rope records counts but has no confirmed export route. This does not connect the hardware to Strava; it records the workout without requiring that connection.
- Collect the workout details. Note the date, start time, and duration. Read the counter before clearing it if you want to retain the jump count.
- Open Strava on the web. Sign in, open the plus menu, and select Add manual entry.
- Choose the activity type. Select Workout for a general indoor skipping session. Do not label stationary skipping as a run to manufacture distance.
- Enter the session information. Use the actual date, start time, and duration. Do not invent distance; stationary skipping does not establish kilometres travelled.
- Add a clear title and description. Name the session weighted jump rope and record your counter reading in the description. Include whether your duration includes rests if that distinction matters to your log.
- Save and inspect the entry. Select Create, open the saved activity, and check the details and sharing settings.
Expected result: Your Strava history contains a workout entry, with the jump count preserved in descriptive text rather than presented as an imported device metric.
Sweatjoy’s Smart Weighted Jump Rope with Electronic Counter fits the equipment category discussed here, but its counter should not be treated as proof of automatic syncing. Keep the gear choice separate from the logging method.
Log each session when automatic export is unavailable
The adjacent workflow is repeatable manual logging: record your rope session first, then add it to Strava once. It removes setup uncertainty, although it does not remove the entry work.
Use a consistent description format: counter reading, session structure, and whether duration includes rests. Keep those same categories across your 2026 training log so later comparisons mean something.
Best for: counter-only ropes and unsupported companion apps. The advantage is a straightforward record you control. The limitation is that you must enter the details yourself, and text notes do not become device-generated metrics.
If you later enable a supported export, test it before changing your routine. Check how the app handles previously saved workouts, then avoid manually adding sessions that are already in Strava.
Do not assume edits travel between services. When you change a title or description after export, inspect the destination record separately instead of expecting both copies to update together.
Troubleshooting
The rope pairs, but Strava receives nothing
Pairing establishes the device connection, not the export connection. Check for an explicit Strava integration in the companion app. If there is none, switch to manual entry rather than repeating Bluetooth setup.
The companion app says connected, but the test is missing
Confirm that the source workout was saved and that you followed the documented export process. Check the Strava account used during authorization. Consult the companion app’s help for export errors instead of assuming every saved workout is automatically sent.
The workout appears twice
Identify which entry came from export and which was entered manually. Keep the record with the correct details, remove the unwanted duplicate, and stop using both routes for the same session.
Jump count is absent from Strava
Open the exported activity and inspect its description and available metrics. An integration can transfer a workout without transferring every rope-specific detail. Keep the original count in the companion app or add it to your Strava description.
The date or duration looks wrong
Compare the destination entry with the saved source workout. Check the phone’s time settings and whether the source records total session time or active time. Correct manual entries using your actual session notes; do not guess missing details.
Customize your workflow
Start with reliable dates and durations. Add jump-count notes only if you will use them to compare sessions. More fields do not improve your log when they are entered inconsistently.
Keep private details out of activity titles and descriptions, and review your Strava sharing settings before posting. An account connection is not a substitute for checking who can see the resulting workout.
For another destination, read the guide to connecting a smart weighted jump rope to Apple Health. Treat that as a separate compatibility check, not evidence that Apple Health will forward your rope sessions to Strava.
FAQ
How do I connect a smart weighted jump rope to Strava?
Use the rope’s documented companion app if it explicitly supports Strava export. Authorize your Strava account, save a test workout, and verify the resulting activity. Without supported export, add a manual workout instead.
Does Sweatjoy’s smart weighted jump rope automatically sync with Strava?
Automatic Strava syncing is not confirmed by the supplied product information. The product is identified as a Smart Weighted Jump Rope with Electronic Counter; that title does not establish Bluetooth, a companion app, or Strava export.
Can I connect a Bluetooth jump rope directly to Strava?
Bluetooth support alone does not establish a direct Strava connection. Follow the rope manufacturer’s documented recording and export route rather than assuming Strava can receive data from the handle.
What’s the best way to log skipping if my rope has no app?
Use a manual Strava workout entry. Record the actual date, start time, and duration, then put the counter reading in the description if you want to retain it.
Will Strava show my jump count after syncing?
Do not assume jump count transfers or appears as a dedicated metric. Inspect a test activity and keep the count in your source app or Strava description when it is absent.
Can Apple Health act as a bridge from my jump rope to Strava?
Do not assume Apple Health provides that bridge. Verify the documented direction of data transfer for each connection before relying on it to move rope workouts into Strava.
Why are there two copies of my skipping workout in Strava?
Check whether you both exported the session and entered it manually. Keep one correct record and use a single route for subsequent sessions.
One last thing
Test the destination, not just the connection. A rope counter, a saved app workout, and a Strava activity are three separate records. The last one is what proves your logging setup works.
Before your next full session in 2026, decide which record holds your detailed jump counts and which holds your training history. That decision prevents duplicate entries and makes missing fields easier to handle.